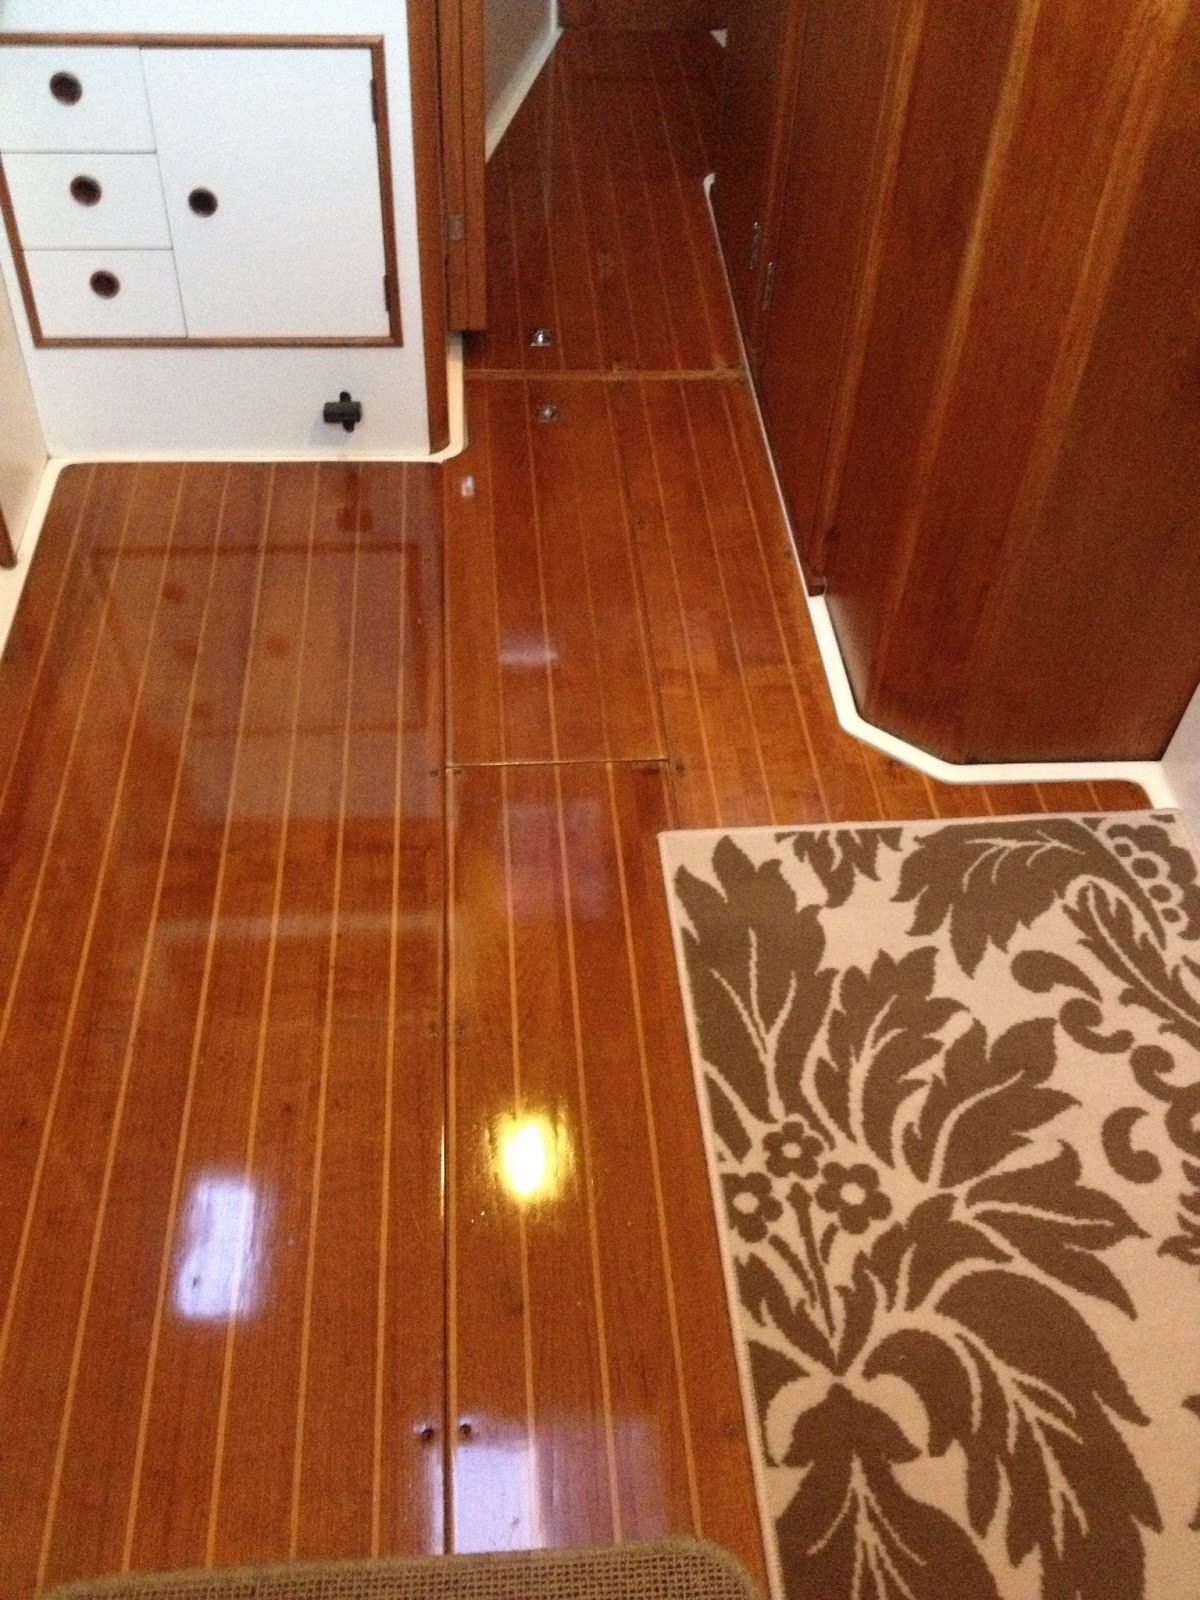
I suppose it didn’t ‘have’ to be done, but I want to straighten out my plumbing, and I’ve removed the dining table for more space, leaving ugly marks on the sole. So what I’ve done is remove the cabin sole and brought it home to sand it down and re-finish it with gloss polyurethane made just for this purpose.
For anyone who hasn’t pulled the sole up, the filth and mildew under there is surprising, and it took a few hours to get it clean.
Hi, I did mine. You must be careful with the sanding as the top surface is thin. What are you refinishing the sole with?
John
Puffin 297 30U
Northport,NY
I'm using 240grit to take the gloss off the old surface. I have a water-based polyurethane that is used on basketball courts (made by an outfit called Cabot).
I'll take photos as I go
I’m not removing the finish back to bare wood, rather just smoothing the surface in preparation for the new coats. The finish isn’t yellowing, just dull. I have taken it back to the veneer where the table legs were, as this has gone grey like exterior teak does. It will be very noticeable so I’ll try some of my teak cleaner/brightener to get the color back.
I’m thinking I might put a coat or two of something cheap on the underside, though it doesn’t seem to have been affected at all over the years.
I too removed my floorboards a few years back. Refinished it over the winter (which I guess you down-under type have right now) and did a light sanding and just used Cetol on the top, bottom and ends to seal it all the way around.
I used a slow speed cordless drill and carefully removed all the screws. Biggest concern is that one is used to walking on the cabin sole and forgets that it is not there anymore for the moment. Good way to break an ankle. Like Lloyd, I cleaned the area up really good. I clean all wiring, ground cable and anything that would hold mildew or dirt. Of course this was probably for 25 years of filth build up. In another 25 years, I’ll be 97 so I think I’ll use a power washer. I roughed up the sole slightly and coated with three coats of Epifanes Spar Varnish. It really looks super good. If I recall, correctly, you can put the second coat on after 24 hours and before 72 hours without sanding. Same with the third coat, etc. . This process of upgrading the cabin sole look allows for an opportunity to check all the screw holes, in the framing, for integrity. I found one that the hole size was a tad sloppy because of original drilling, not because of wood softness. For that, I just went to the closest piling and took a sliver of well treated wood and jammed it in the hole, broke it off creating a sound receiver for the screw when it went back in.
Mine were held in by a number of stainless panhead screws. They came out very easily with a cordless drill. In fact, many of the holes had been chewed up a bit, so I am going to inject them with epoxy and re-drill the holes before re-installation. I am also going to run a thin strip of rubber weather-stripping around the perimeter and across the ribs…this should eliminate the creaking I got in some places.
I’m using this product to re-finish the panels, it’s half the price of marine varnish or cetol:
Although I swear mine is water-based…perhaps a new product.
I never did get the areas that sat under the table legs completely free of greyish color…it must be the product of 25 years of being covered. Nevertheless, the boards have several dings and dents, so I’m by no means creating a piece of elegant furniture…it should still look a lot better.
I am very tempted to do the same thing to all of the timber work onboard. There is certainly something very refined about the factory satin finish, but the high gloss of the polyurethane would really add some opulence to the cabin.
It’s a flooring-specific poly, which (and I don’t know why) is non-skid. It is recommended for sports floors like basketball courts. If it gets wet though, all bets are off.
I removed the panels from the boat and took them home to the garage. I washed them all to get the build-up of dirt off, then I started sanding. I sanded with a random orbital sander at 180grit for 2-3 light passes, then 240grit for a further 4-5 passes. ***You are not removing the previous finish, rather you are smoothing the surface. I wiped the surface down with paint thinner to get it dust free.
I then applied 3 coats of Cabot CPT water-based flooring polyurethane over consecutive days with a foam brush. You do not need to sand between coats regardless of the interval.
It goes on very milky, but clears and dries to the touch in 3hrs.
I bought a one liter can and I may have used 1/4 of it, that includes a coat on the edges and a coat on the bottom of the panels.
16hrs after the 3rd and final coat went down, the surface was as hard as glass…and very very shiny. I think additional sanding at the outset, and perhaps 4-6 coats would have produced a flawless finish, but it would almost be too smooth.
Three screw holes had turned black with mildew growth under the original varnish, and had to be sanded down to bare wood. This removed the black color/stain, but it also removed the patina of the previous coating, so it is noticeable. I suppose it may be less noticeable in time, but it’s certainly better than the black stain.
All in all it took 5 nights, about an hour/night to finish.
John:
Nice job, and nice documentation on how you did it.
Satin vs. gloss is a matter of taste. Go for what you like!
Joe Tierney, /Allegro,/ 1992 NS33 #64, Annapolis, MD, USA
It is not the critic who counts, not the man who points out how the strong man stumbled, or where the doer of deeds could have done better. The credit belongs to the man who is actually in the arena;
TR, 4/23/10, Sorbonne, Paris
Indeed I removed the dinette table before I began this project, and I'm going to trial leaving it out. By next summer I will have three boys under three, and room to toddle about down below is paramount. Plus I was getting frustrated with that table. It was forever in the way and I began to notice all the cabinets and lockers on the starboard side were empty for this reason. I can put it back in about an hour (it's physically at home indoors), but I can just as easily develop a simple stowable table for those times when either TV trays or the cockpit table aren't practical. If I come up with an ingenious alternative ill post it here. I've seen on this form drop down tables mounted to the bulkhead but I might come from a different angle that keeps it out of sight when not used.
Photos of drop downs using the original tables are available from Ron Singerman and myself.
Joe Valinoti
S/V IL Gatto NS30U #221 (1984)
Sea Harbour Yacht Club
Oriental, NC
 Before
 After
After All gone